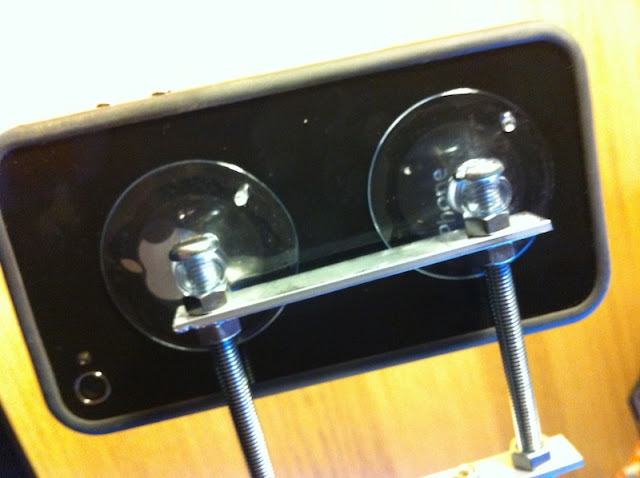
Following on from getting the dualshock controller talking to Raspberry Pi yesterday, we now want to look at a way of binding the controller to events. jkeys allows us to do that with Python.

I took the jkeys source and hacked it about (also taking some cues from the Playing sounds and using buttons with Raspberry Pi Adafruit tutorial).

Basically removing the need for a display and putting the names of the sound files in the config instead of the key presses (the joypad is kept as-is, with the sound files renamed to Right, Left, Up, Down for simplicity).

We can now kick off the program like this:-

./soundkeys.py config.joy
Continue →

Last year I bought a cheap PS2 dualshock controller to try hacking it to work with iPad via Arduino and the Redpark Serial Cable. I didn‘t really get very far, as the library I was using just wouldn’t see the controller.

However, a £3 “Neewer” adapter promised to make life much easier when using RPi. First test, was hook it up to the mac, and using the very handy USB Overdrive, I was able to ensure that the adapter was indeed working, and the controller was sending data. So far so good … next up RPi.

(I used the instructions from this forum post to get it working: HOWTO : Joystick/Gamepads under Ubuntu)

First install the “joystick” application

sudo apt-get install joystick

Then running these two commands:-

jscal /dev/input/js0
jstest /dev/input/js0
Continue →

Last year I posted about using an iPhone with an Arduino to create a remote controlled car. There are a few issues that make it less than ideal:

First, is obviously that it ties up my iPhone whilst using the car. Also, the connection between the iPhone and the Arduino was using the Redpark Serial Cable - connecting to the iPhone using the 30 pin dock connector; less than ideal as Apple is rapidly moving away from this connector.

Secondly, because at the time, the library for streaming video from the phone to the ipad didn‘t support Peer-to-Peer streaming (I think it does now, but haven’t had a chance to test this out), the video went via a web server and therefore introduced a good 2-3 second lag; not ideal when trying to control a remote vehicle.

One option for solving both of these problems would be to replace the iPhone on the car with a Raspberry Pi and a web cam. I had been intending to buy a cheap webcam for this purpose, but then realised I already have a USB camera in the form of the PS3 EyeToy camera.

I initially used Chris Barnes' tutorial Using a PS3 EyeToy with the Raspberry Pi to get it working with ‘Motion’ but found it very slow; nearly as much lag as sending the video up to the web server and down again, and with a worse framerate. Also, because it‘s designed for capturing video and stills when it sees motion, it quickly filled up the RPi’s SD card.

With that in mind, I tried Mjpeg Streamer (although, iirc, I just used apt-get to install it). Initially no luck; the built in server worked, but no images / video were sent. On a whim, I tried forcing YUYV format - bingo! It seems that the EyeToy doesn‘t support the mjpeg format, which is annoying because it means that the RPi’s CPU needs to do a lot of processing for mpeg-streamer to get the YUYV format into mjpeg. For my purposes though, I could knock the frame size down to 160x120px, thus making the CPU load around 25%, and allowing me to get around 10 fps.

I used the following arguments to start mjpeg streamer:

mjpg_streamer -i "/usr/lib/input_uvc.so -d /dev/video0 -y  -r 160x120 -f 10" -o "/usr/lib/output_http.so -p 8090 -w /var/www/mjpg_streamer"

As it is streamed over the network, this is just as easily viewed on iOS as on the Mac, although the “Javascript” option seems to work best with iOS.

Next test will be to get myself a cheapo webcam that supports mjpeg and see how that performs.

Continue →

The obvious extension for yesterday's post about using Phidgets and Raspberry Pi is to connect the Phidget webservice to iOS.

Given the open nature of Raspberry Pi, it makes an excellent companion to iOS especially for hardware related projects.
The hardware setup, with respect to the RPi / Phidgets is the same as the last post. The code is a hacked together version of the Phidgets iOS example code for working with the PhidgetInterfaceKit. For a future hacklet, I'll clean up the code, include the device browser code and post it on gihub.

A future task, if I use Phidgets further, would be to write a nice Obj-C wrapper for the Phidgets C API.

Continue →

A good number of the hacklets I'm working on at the moment are based on the Raspberry Pi, and getting to talk to stuff I want to combine with other interesting technologies.

The first of these is connecting Raspberry Pi to a Phidget RFID reader. It's a simple EM4102 (~125kHz) RFID reader that connects to a computer via USB. Unlike the Sparkfun device I was experimenting with last year, which reads and writes data on RFID tags, this one just reads the tag and sends the identification number.

Getting it working with the Raspberry Pi was very simple following the Phidgets Linux page; I don't think I needed to do anything differently to what it proposes on that page. I am however using the Adafruit Raspberry Pi Educational Linux Distro which may or may not make a difference.

One thing to note for the RPi is that the reader does seem to require more power than the RPi can provide over USB, so a powered hub is required.

Continue →

I made a comment earlier this year about 2013 being an ugly year, and thus to combat it, we need unprecedented creation. (As an aside I preferred the word ‘creation’ to ‘creativity’ as it is about actual making, in whatever field, rather than some sort of hand-wavy generic ‘be creative’ notion.)

So, in that spirit, I‘m embarking on ’Hacklets' - these are little bits of hackery that are really too small to be called hacks but a bunch of them together might form a whole hack!

Also these might not be big breakthroughs for anyone else (or even me for that matter), but are more likely to be little nuggets of hackness that I'm aiming to mix up with other stuff.

If any of these look like something you might want to put in a project, please get in touch!

iPad responding to RFID tags currently mediated by Arduino and iPhone (the Arduino does the reading and sends the data back to the iPhone which passes it on to the iPad).

The next steps are to remove the iPhone from the mix by using a WiFi chip on the Arduino, and adding reading and writing of custom data onto the RFID chips.

Continue →
Copyright © 2013 - Brothers Bennett - Powered by Hexo
- Ported theme GreyShade -